Step 1
Go to the https://payments.amazon.com/signup page:
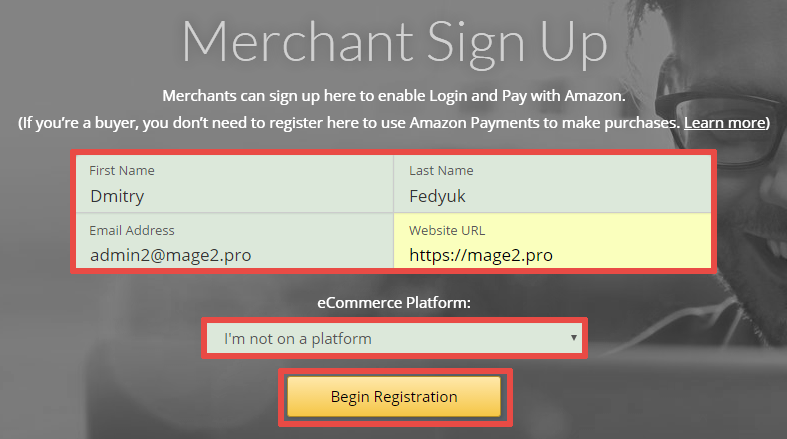
Amazon does not have an in-house extension for Magento 2, so choose «I’m not on platform» option to use the Mage2.PRO Amazon Payments Magernto 2 extension.
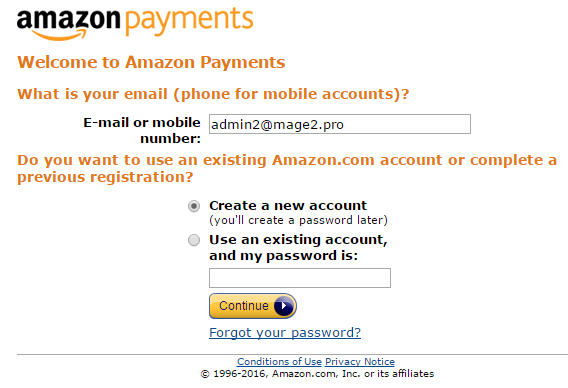
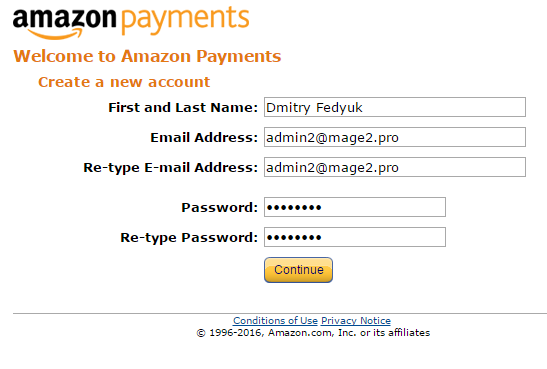
Step 2
You will be redirected to the «Welcome to Amazon Payments» form.
You need an Amazon account to use the Amazon Payments service, so specify your Amazon account here or create a new one (as I did on the screenshot):
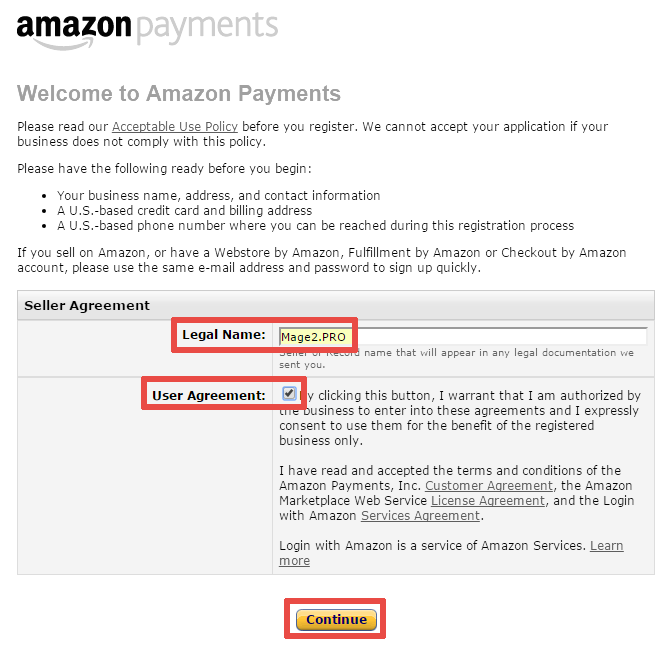
Step 3
You will be redirected to the «Seller Agreement» form.
- Specify your business name
- Click the «User Agreement» checkbox.
- Press the «Continue» button.
Step 4
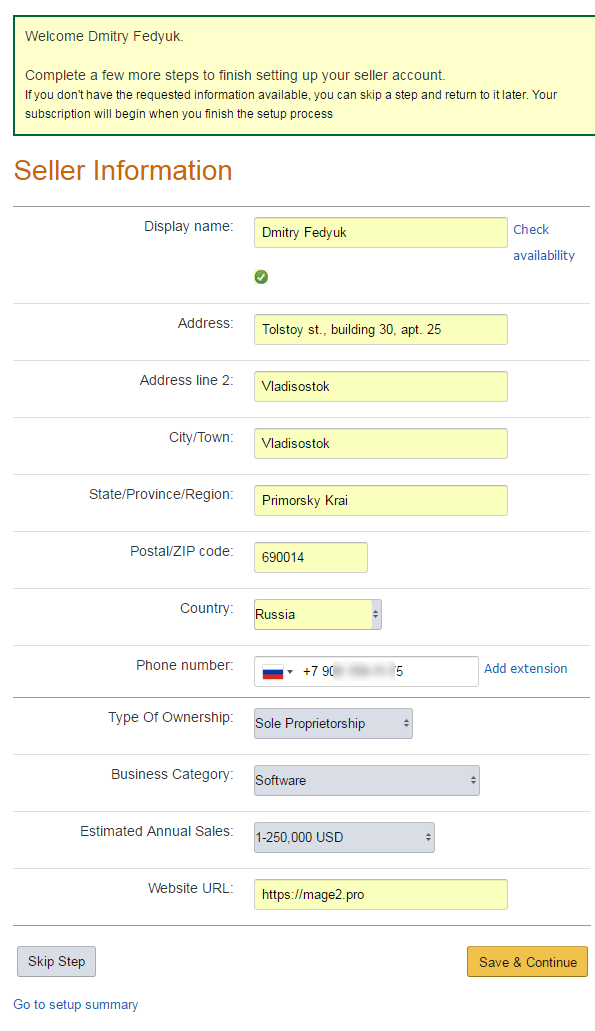
You will be redirected to the «Seller Information» form.
Fill the form and press the «Save & Continue» button:
Step 5
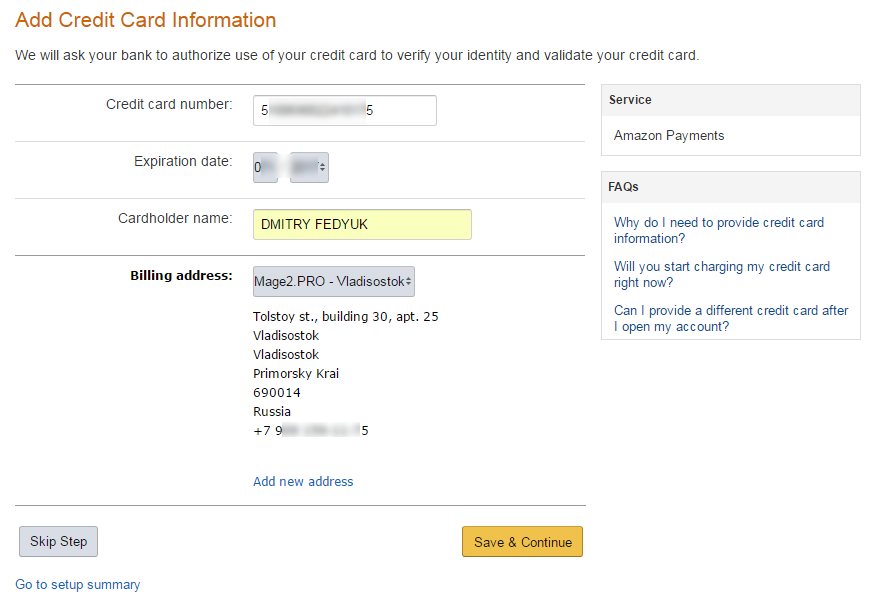
You will be redirected to the «Add Credit Card Information» form.
Fill the form and press the «Save & Continue» button:
Step 6
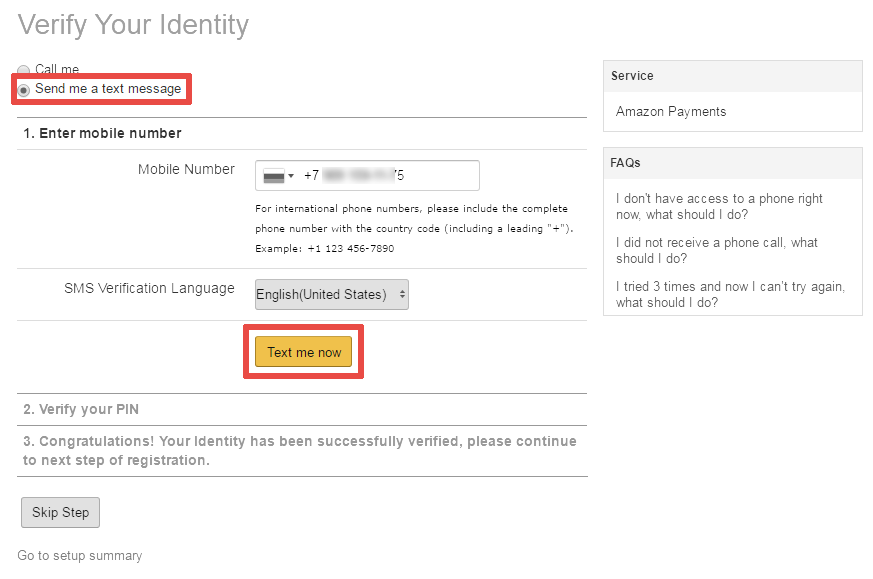
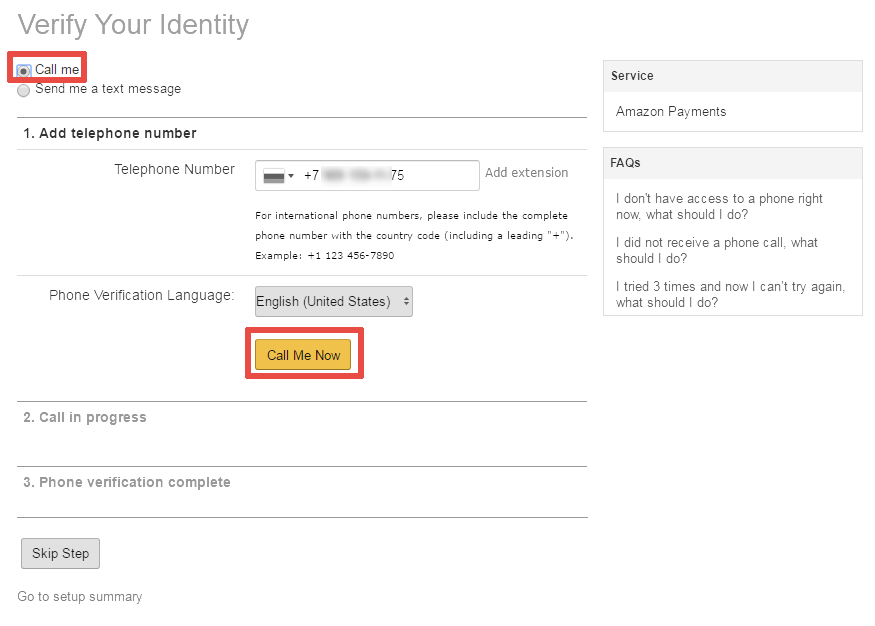
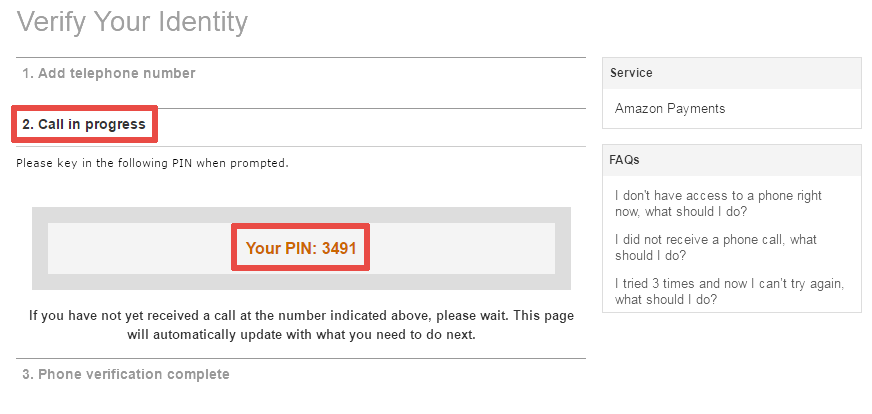
You will be redirected to the «Verify Your Identity» form.
Verify your phone number with an SMS or an automatic phone call.
A case of the SMS verification:
A case of the authomatic phone call verification:
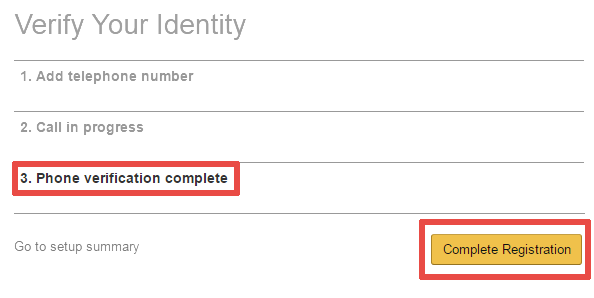
Step 7
After the verification press the «Complete Registration» button:
Step 8
You will be redirected to your Amazon Seller Central account.
You should provide your tax identification information.
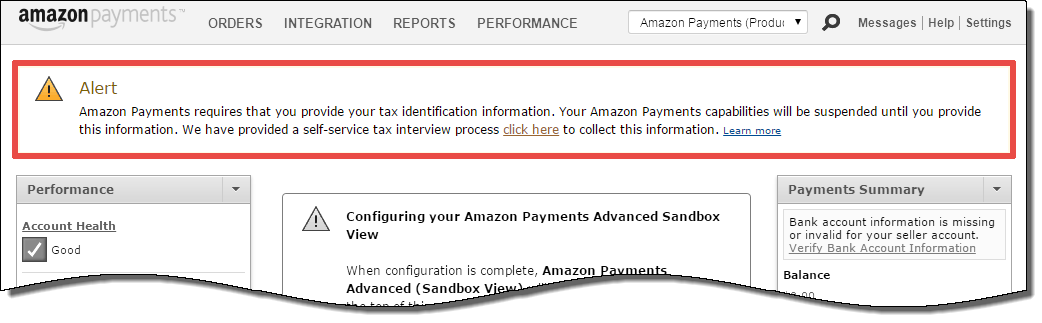
Press the «click here» link.
Step 9
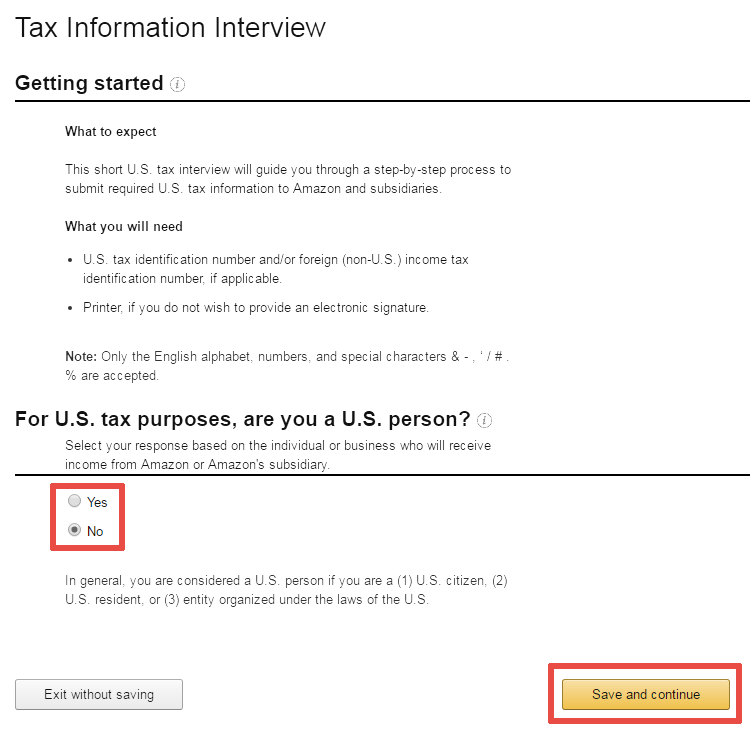
You will be redirected to the «Tax Information Interview» form.
Step 9.1
Select whether you are an U.S. person and press the «Save and continue» button:

Step 9.2
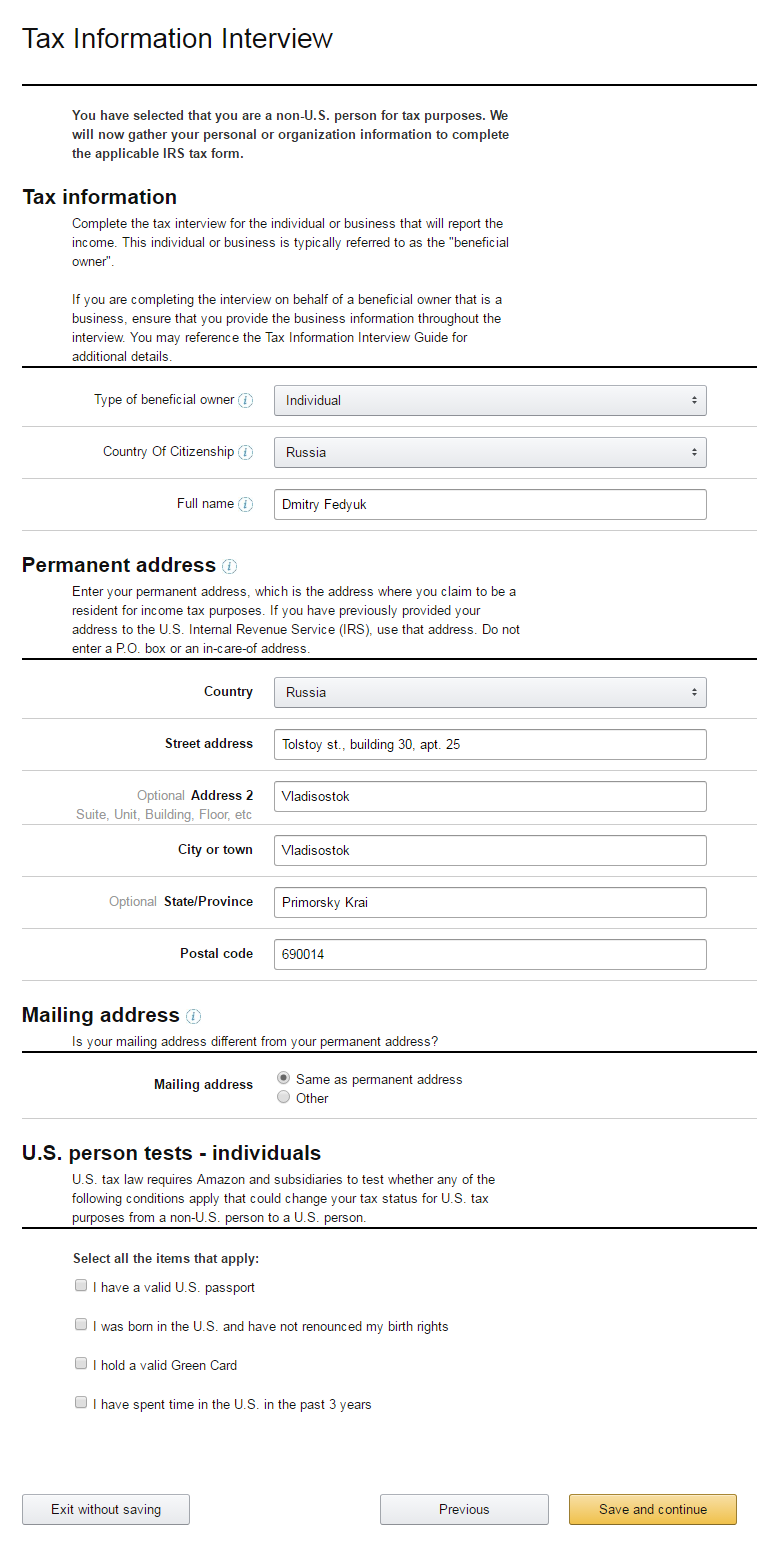
Fill the «Tax information» form and press the «Save and continue» button:
Step 9.3
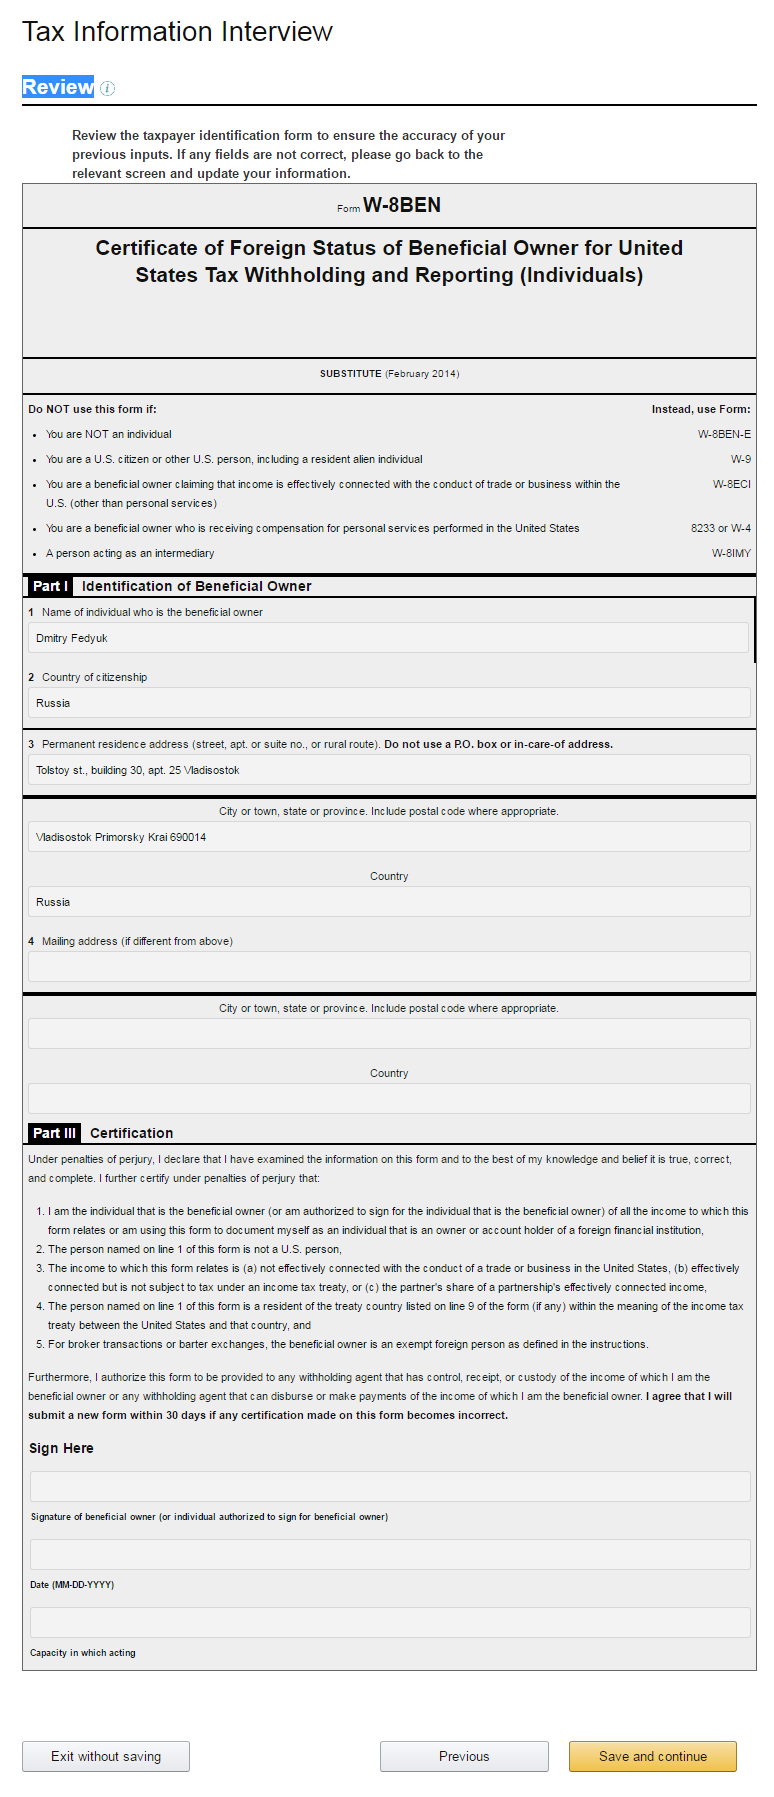
Review your data and press the «Save and continue» button:
Step 9.4
You will be redirected to the «Consent to electronic signature» form.
- Press the «I consent to provide my electronic signature» button.
- Check all the checkboxes in the «Electronic signature» section.
- Type your name in the «Signature of beneficial owner (or Individual authorized to sign for beneficial owner)» field.
- Specify your email address in the «E-mail address)» field.
- Choose your «Capacity» (I set it as «Individual»).
- Press the «Submit» button.

Step 9.5
You will see the «Your IRS Form W-8 has been received» message.
Press the «Edit interview» button:
